This is an overview of how-to upload tests & exams using the SAS Faculty Portal!
Step 1 - Course overview, accessing tests & exams for specific courses
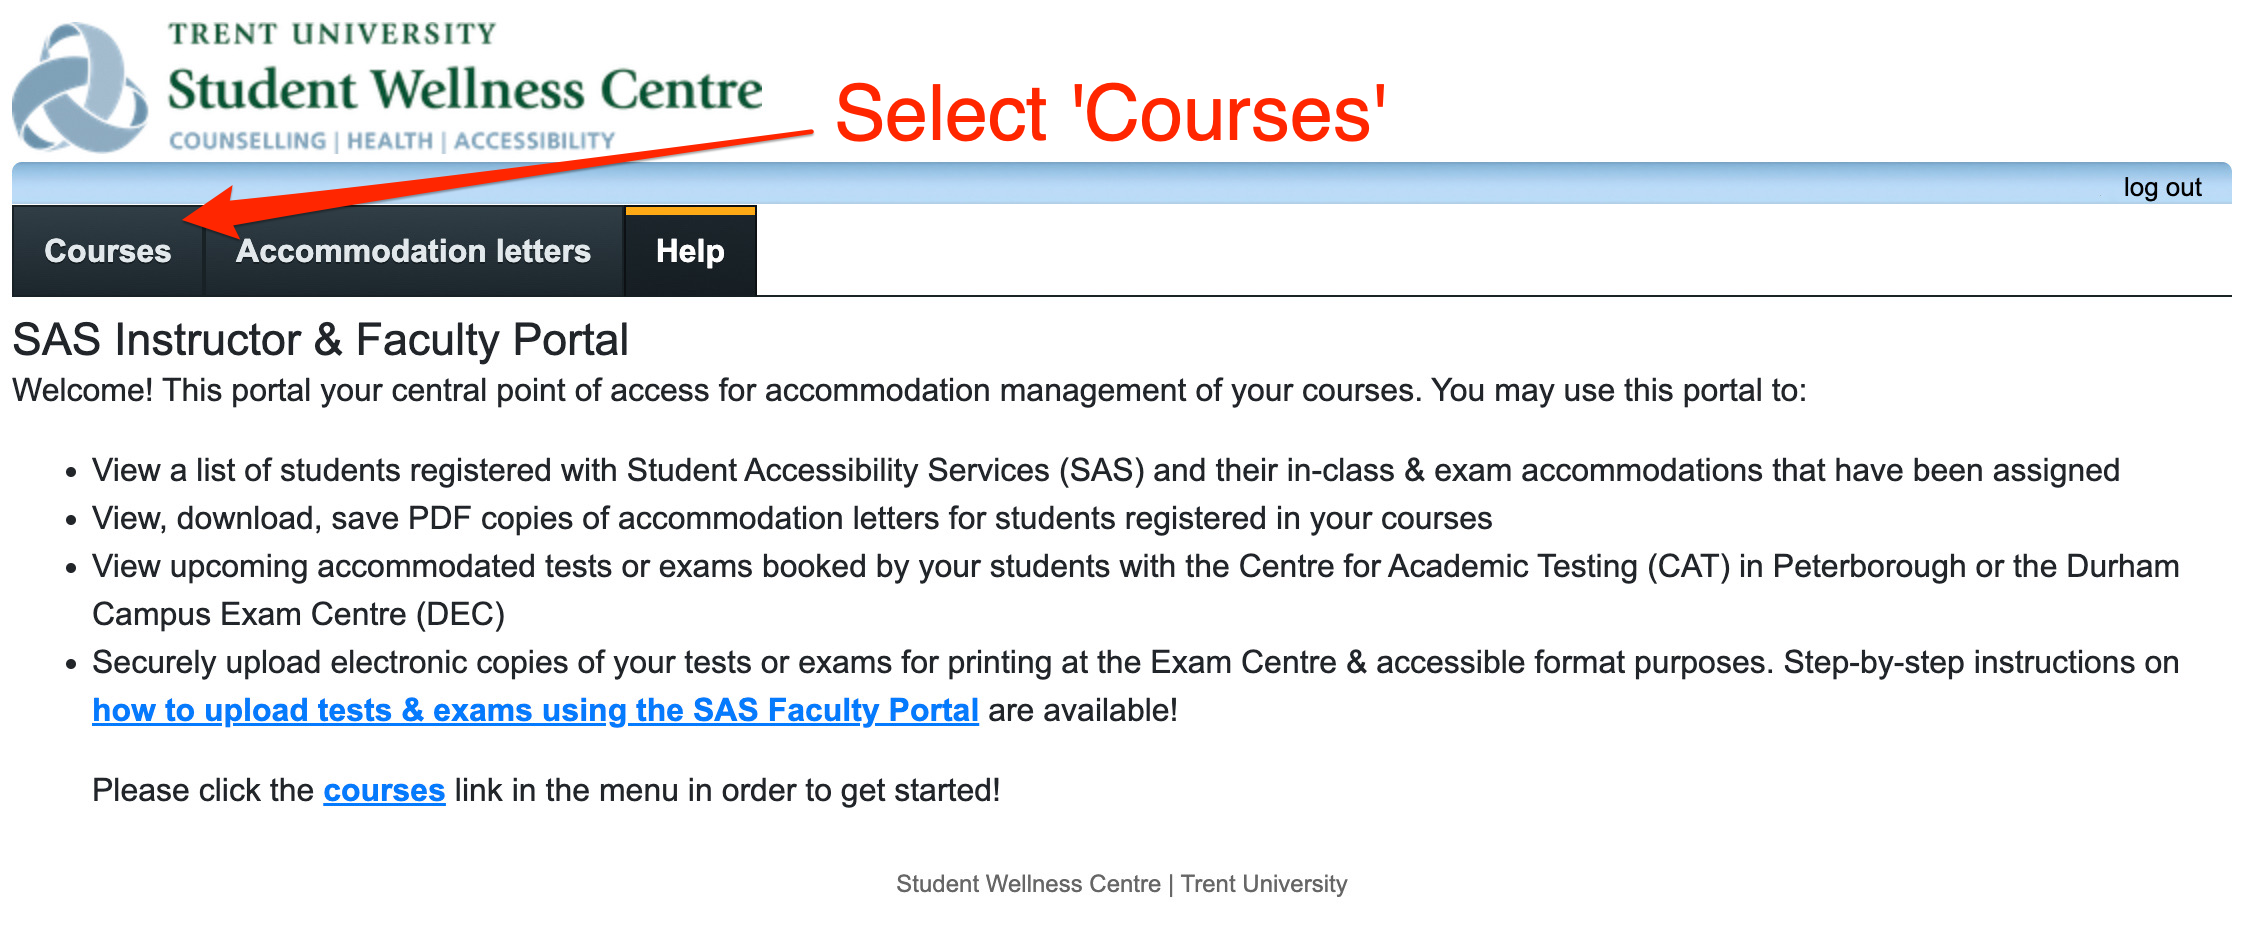
When you first login to the SAS Faculty Portal, you land on the 'Help' tab that provides some basic information about the contents of the portal. From the navigation menu, select the 'courses' tab to display a list of the courses you are the instructor for.
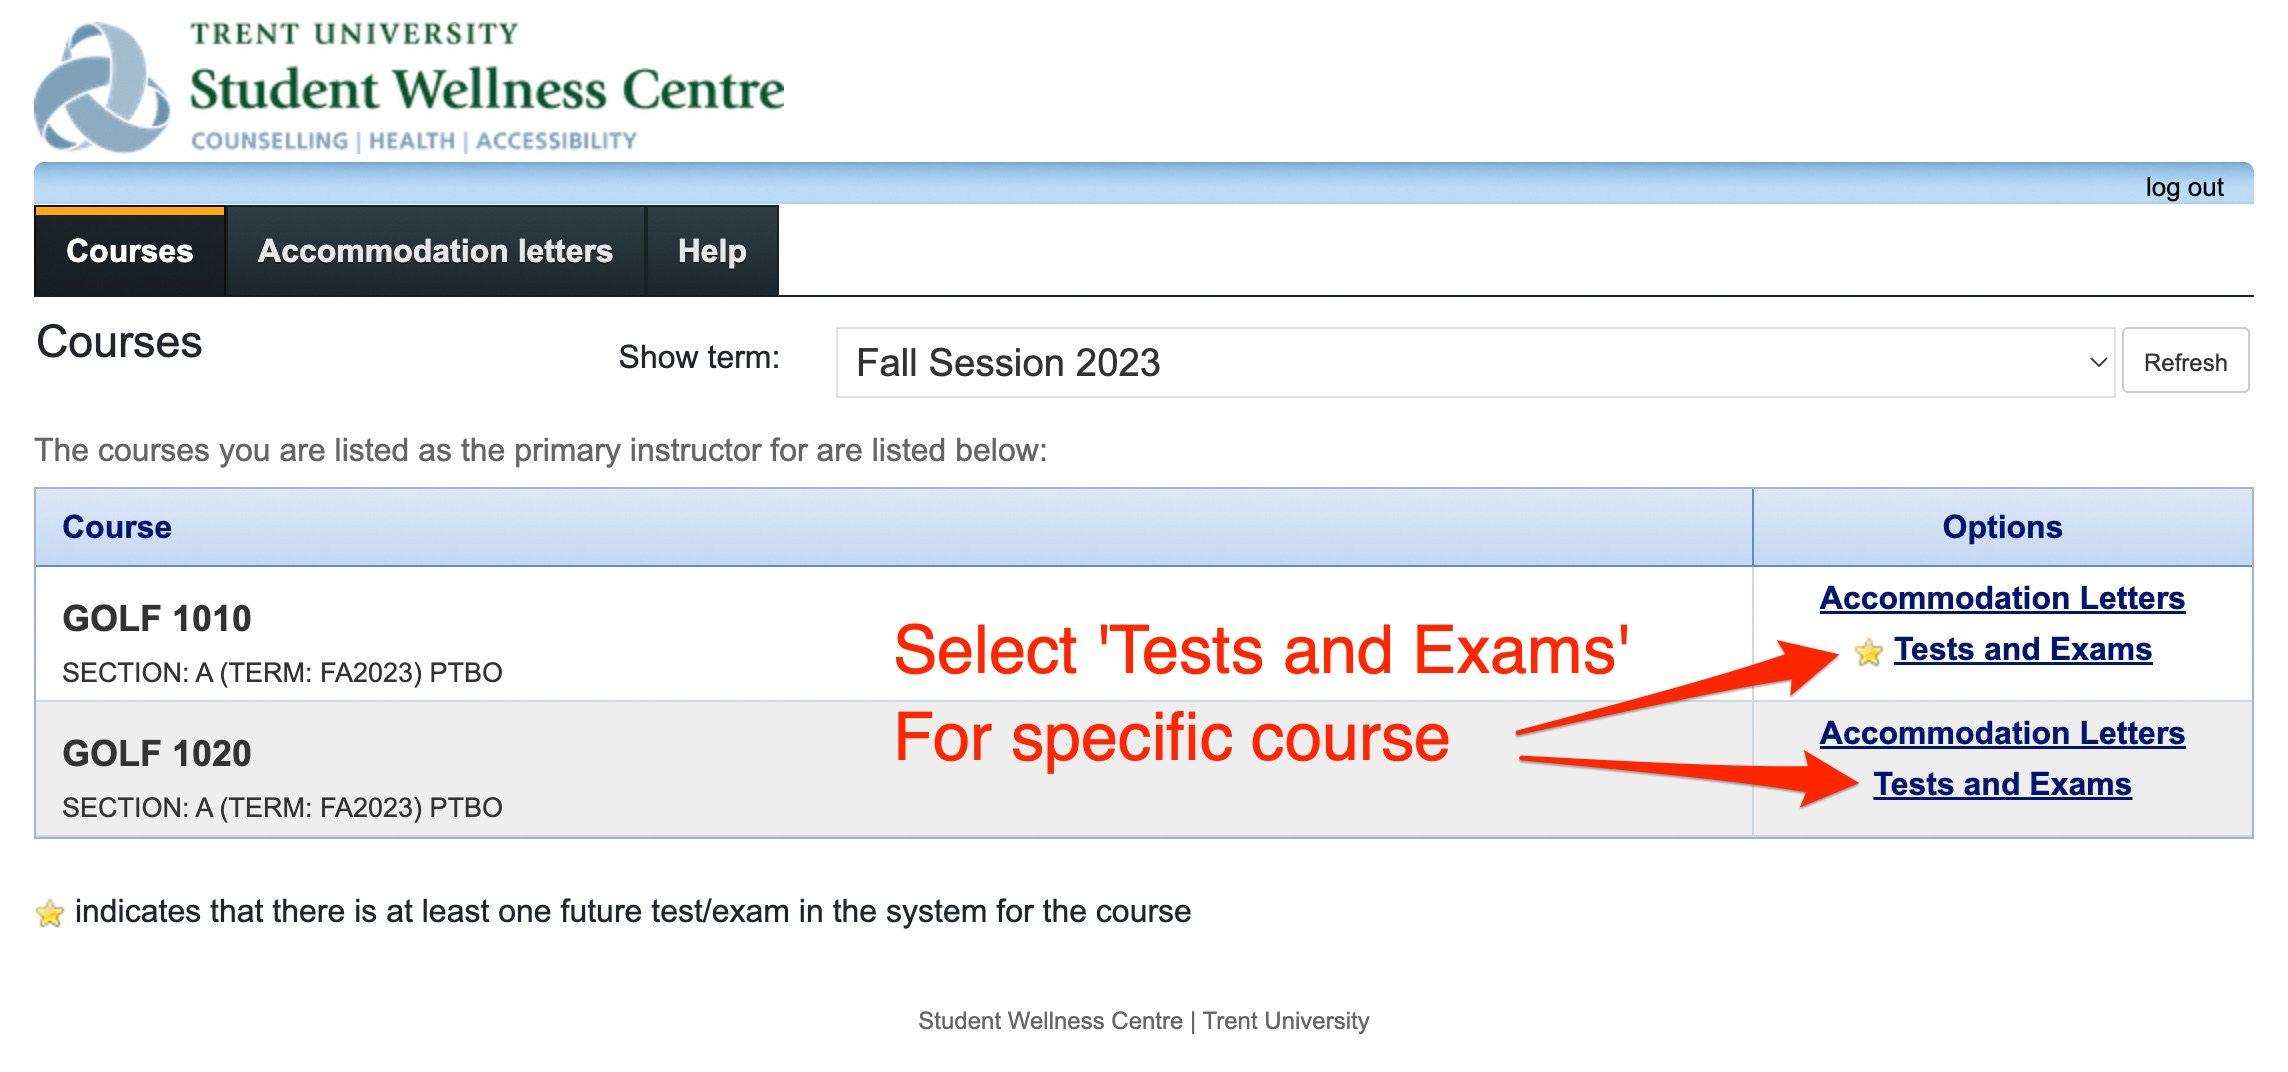
If your courses is cross-listed (as shown in the example below) each course is considered unique, and treated as such. Students will be listed & booked according to how they are registered; tests must be uploaded to each cross-listing individually.
Follow the 'Tests and Exams' link under the 'Options' column to get started!
Step 2 - Test / Exam booking overview
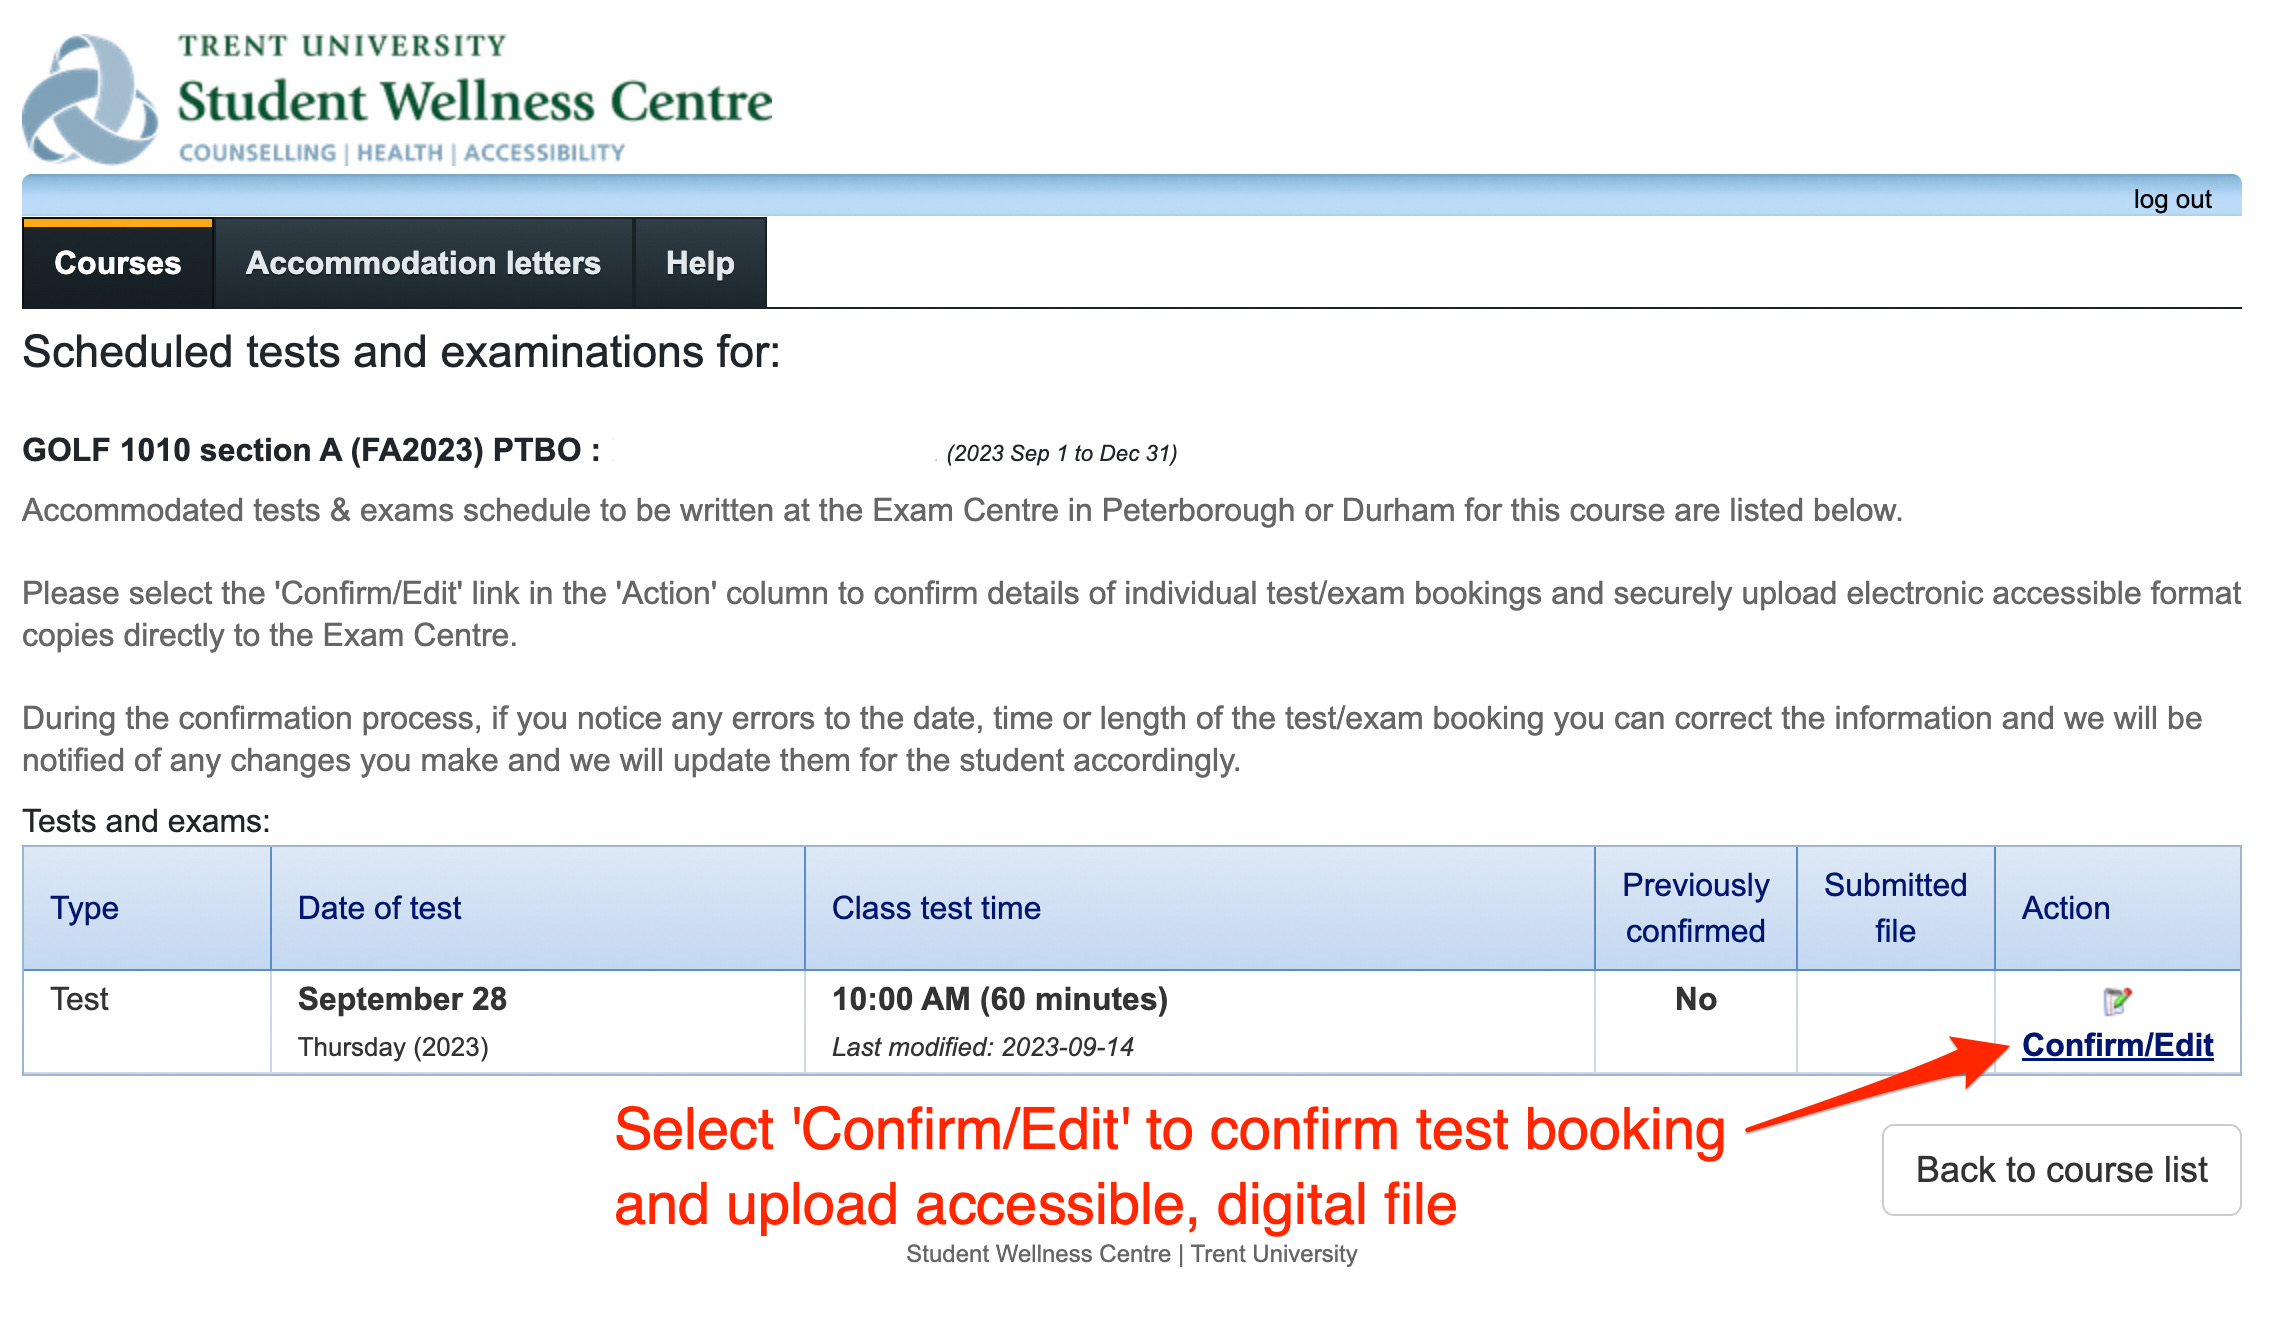
To begin the process of confirming a test or exam and to upload an accessible, electronic copy directly to the Exam Centre, select the 'Confirm / Edit' link from the 'Action' column.
If you have multiple students writing the same exam, a single exam can be uploaded for a group of students.
If for accommodation related reasons, you have students writing a final exam on a different date or time from the rest of the class, their information will also be displayed below and a unique exam may be uploaded for their specific testbooking. Details of their exam may be confirmed in subsequent steps.
Step 3 - Confirming specific exams
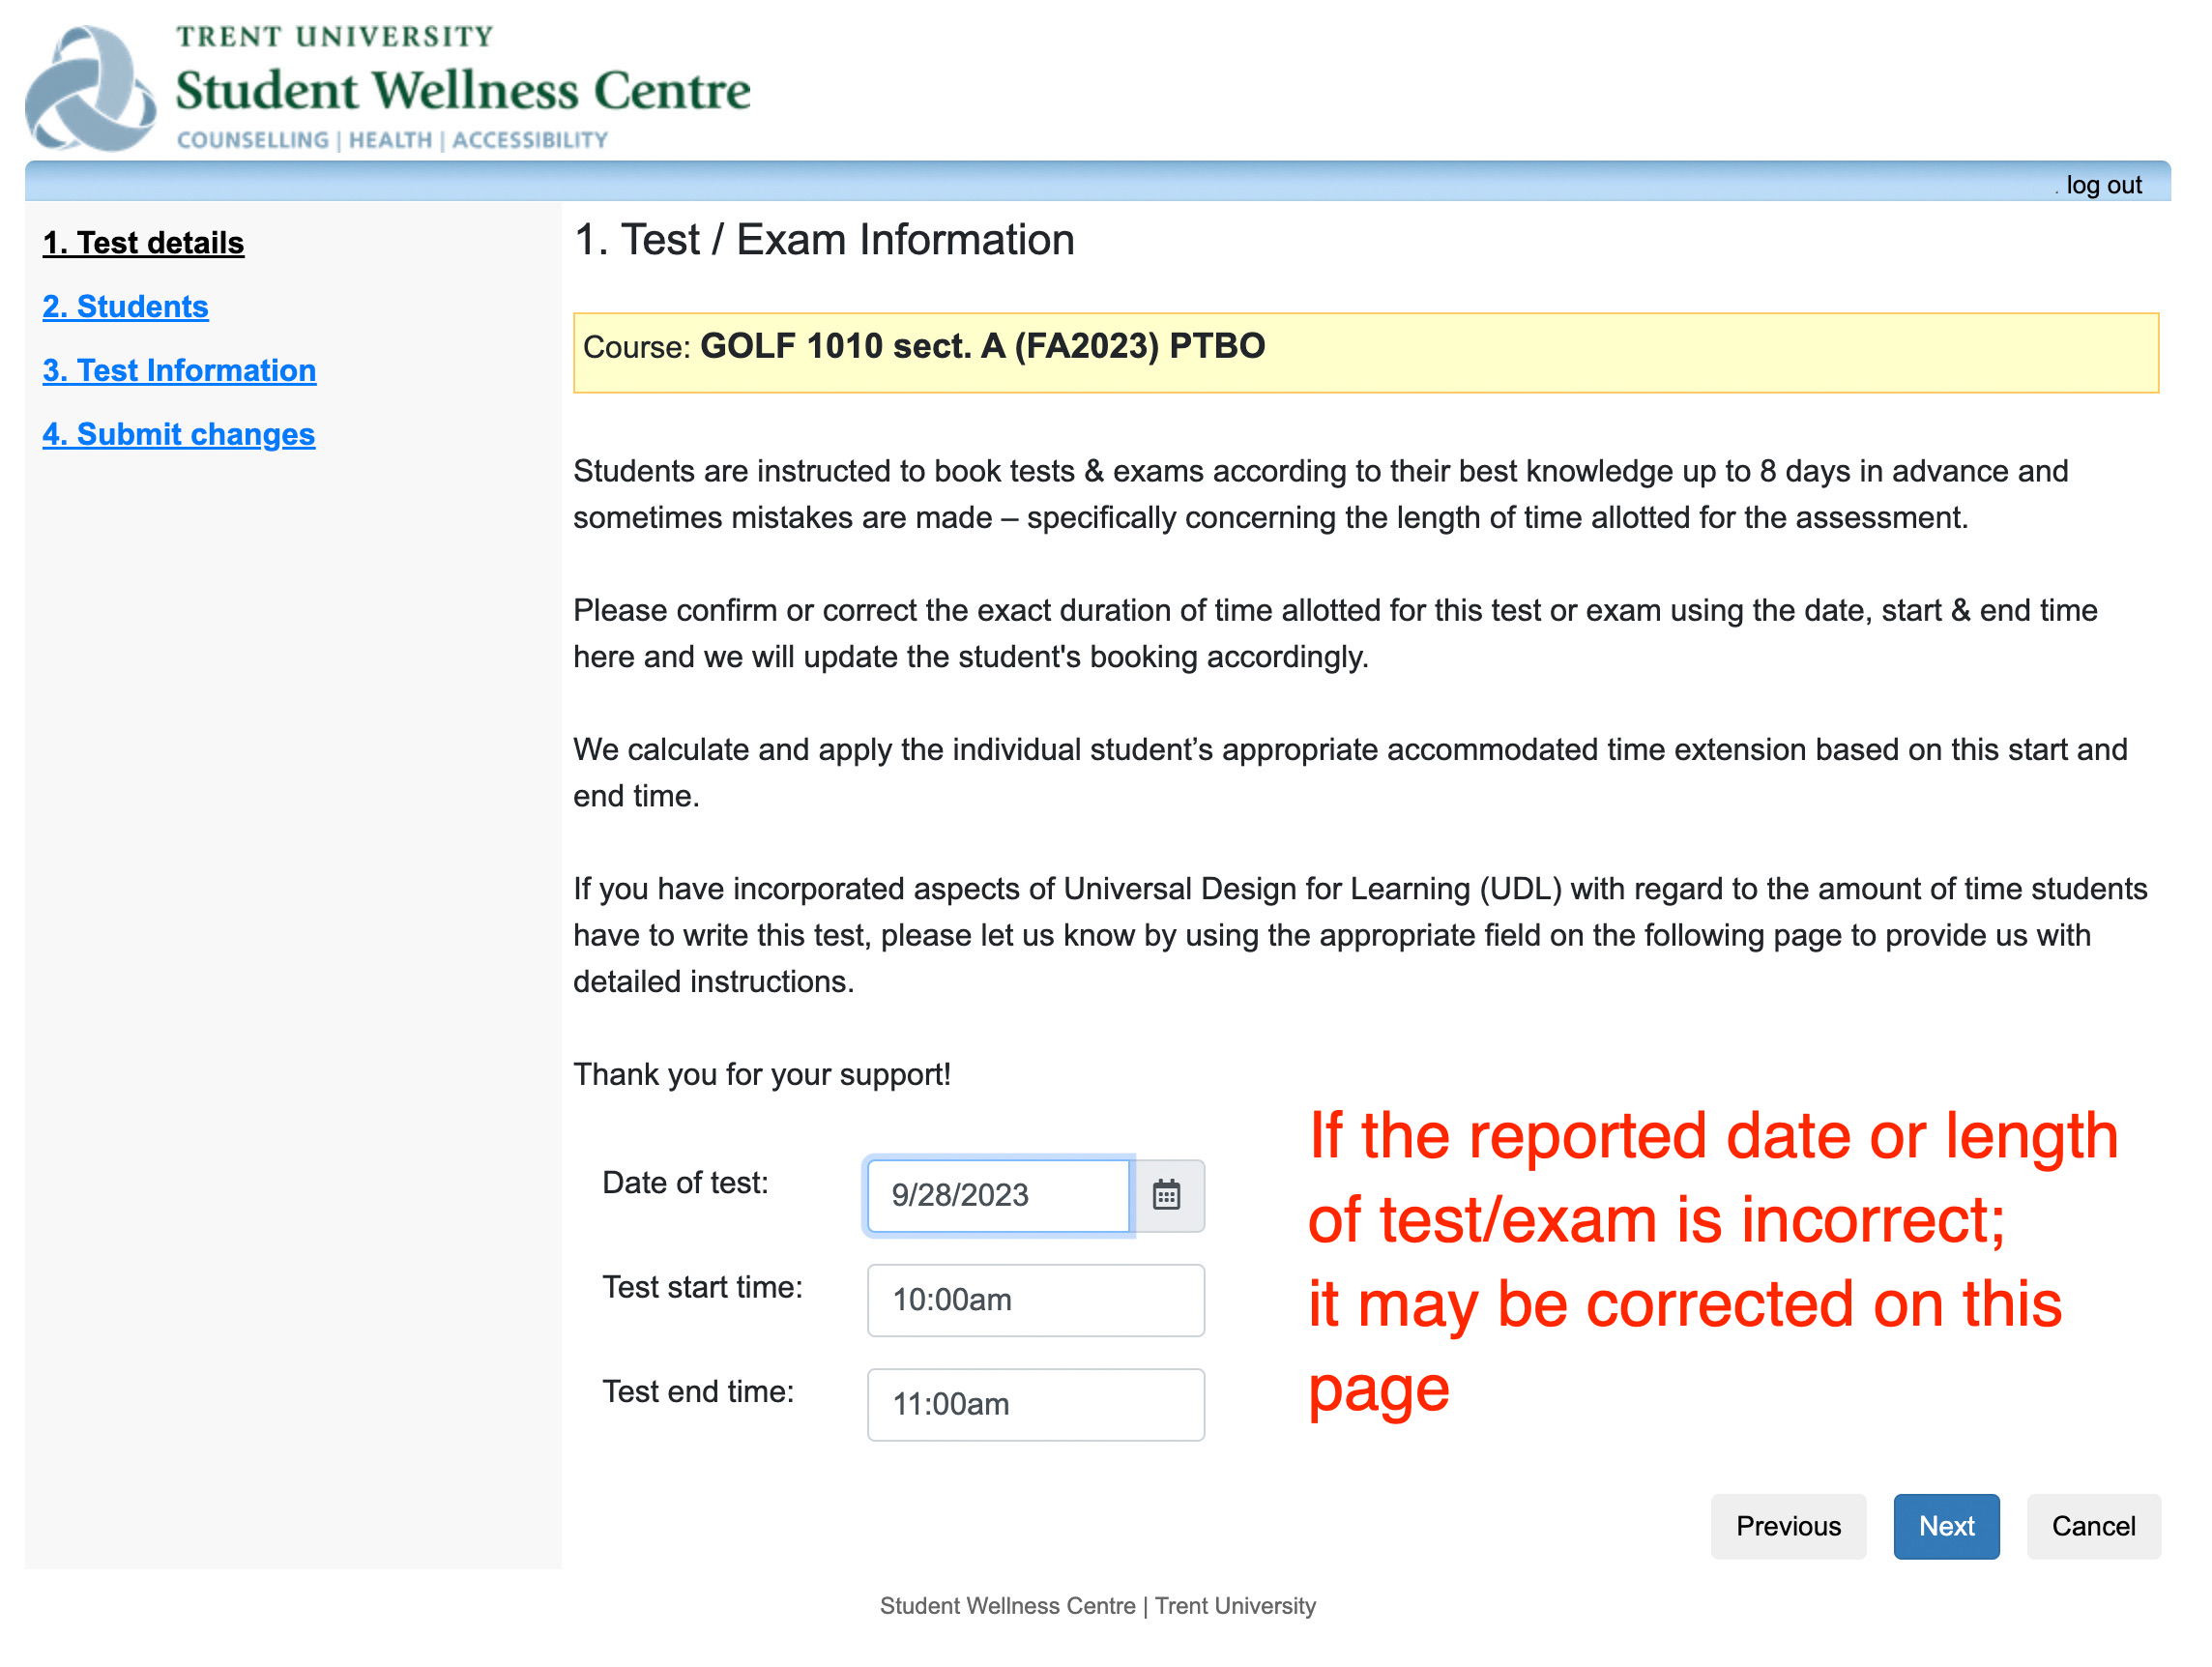
Students are instructed to book tests & exams according to their best knowledge as soon as they are made aware of the assessment date. It is helpful for students to know, in advance of booking, the length of their test - but often they are unsure and will typically book for the length of the class - and in some cases, this is too much time.
In this step, you are asked to confirm the testbooking details to make sure the appropriate test duration is entered as correct. If you notice an error during the booking in this step, you can confirm the correct date, time & duration of the schedule test or exam. This will notify us of the correct length of the assessment and we can update the other bookings accordingly.
Step 4 - Student list of specific booking
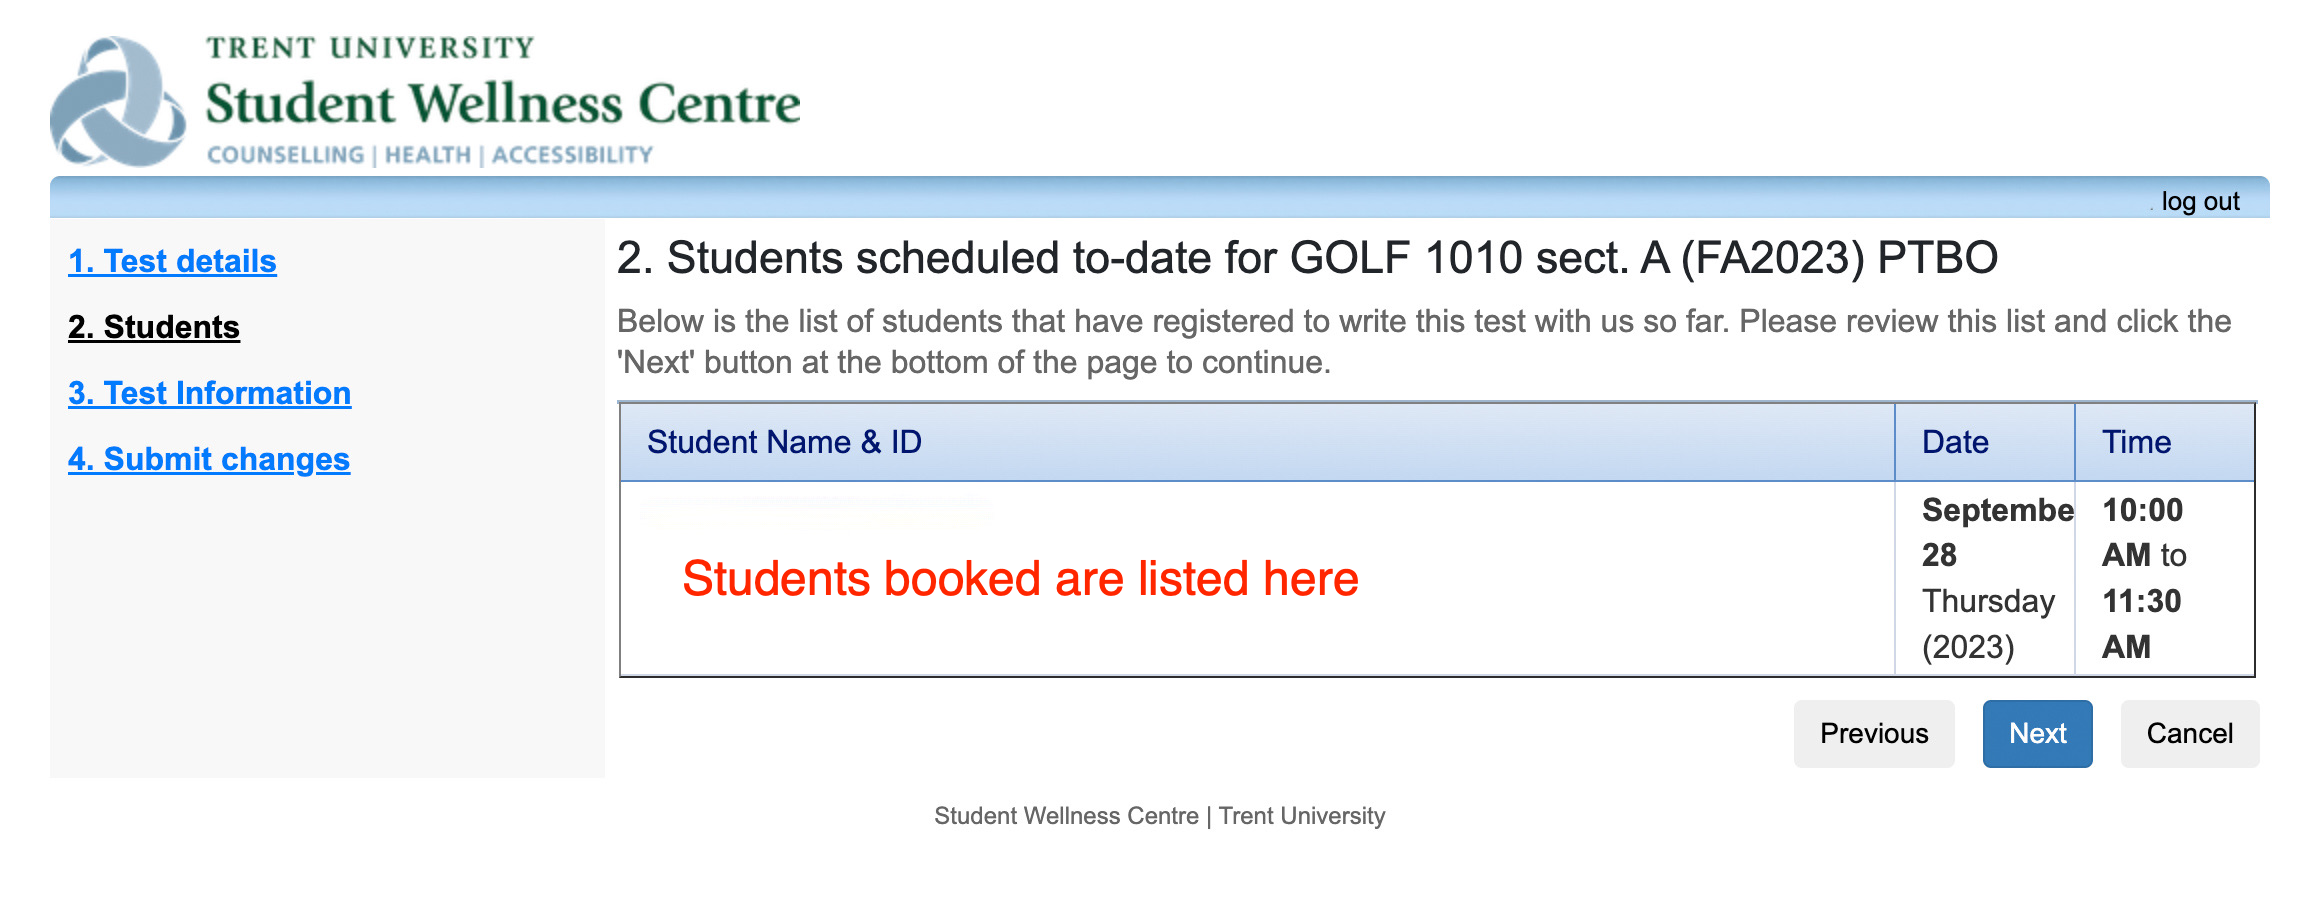
Each student booked to write with the CAT on a specific date/time will be listed on the screen as shown.
Step 5 - Test information screen *Important!*
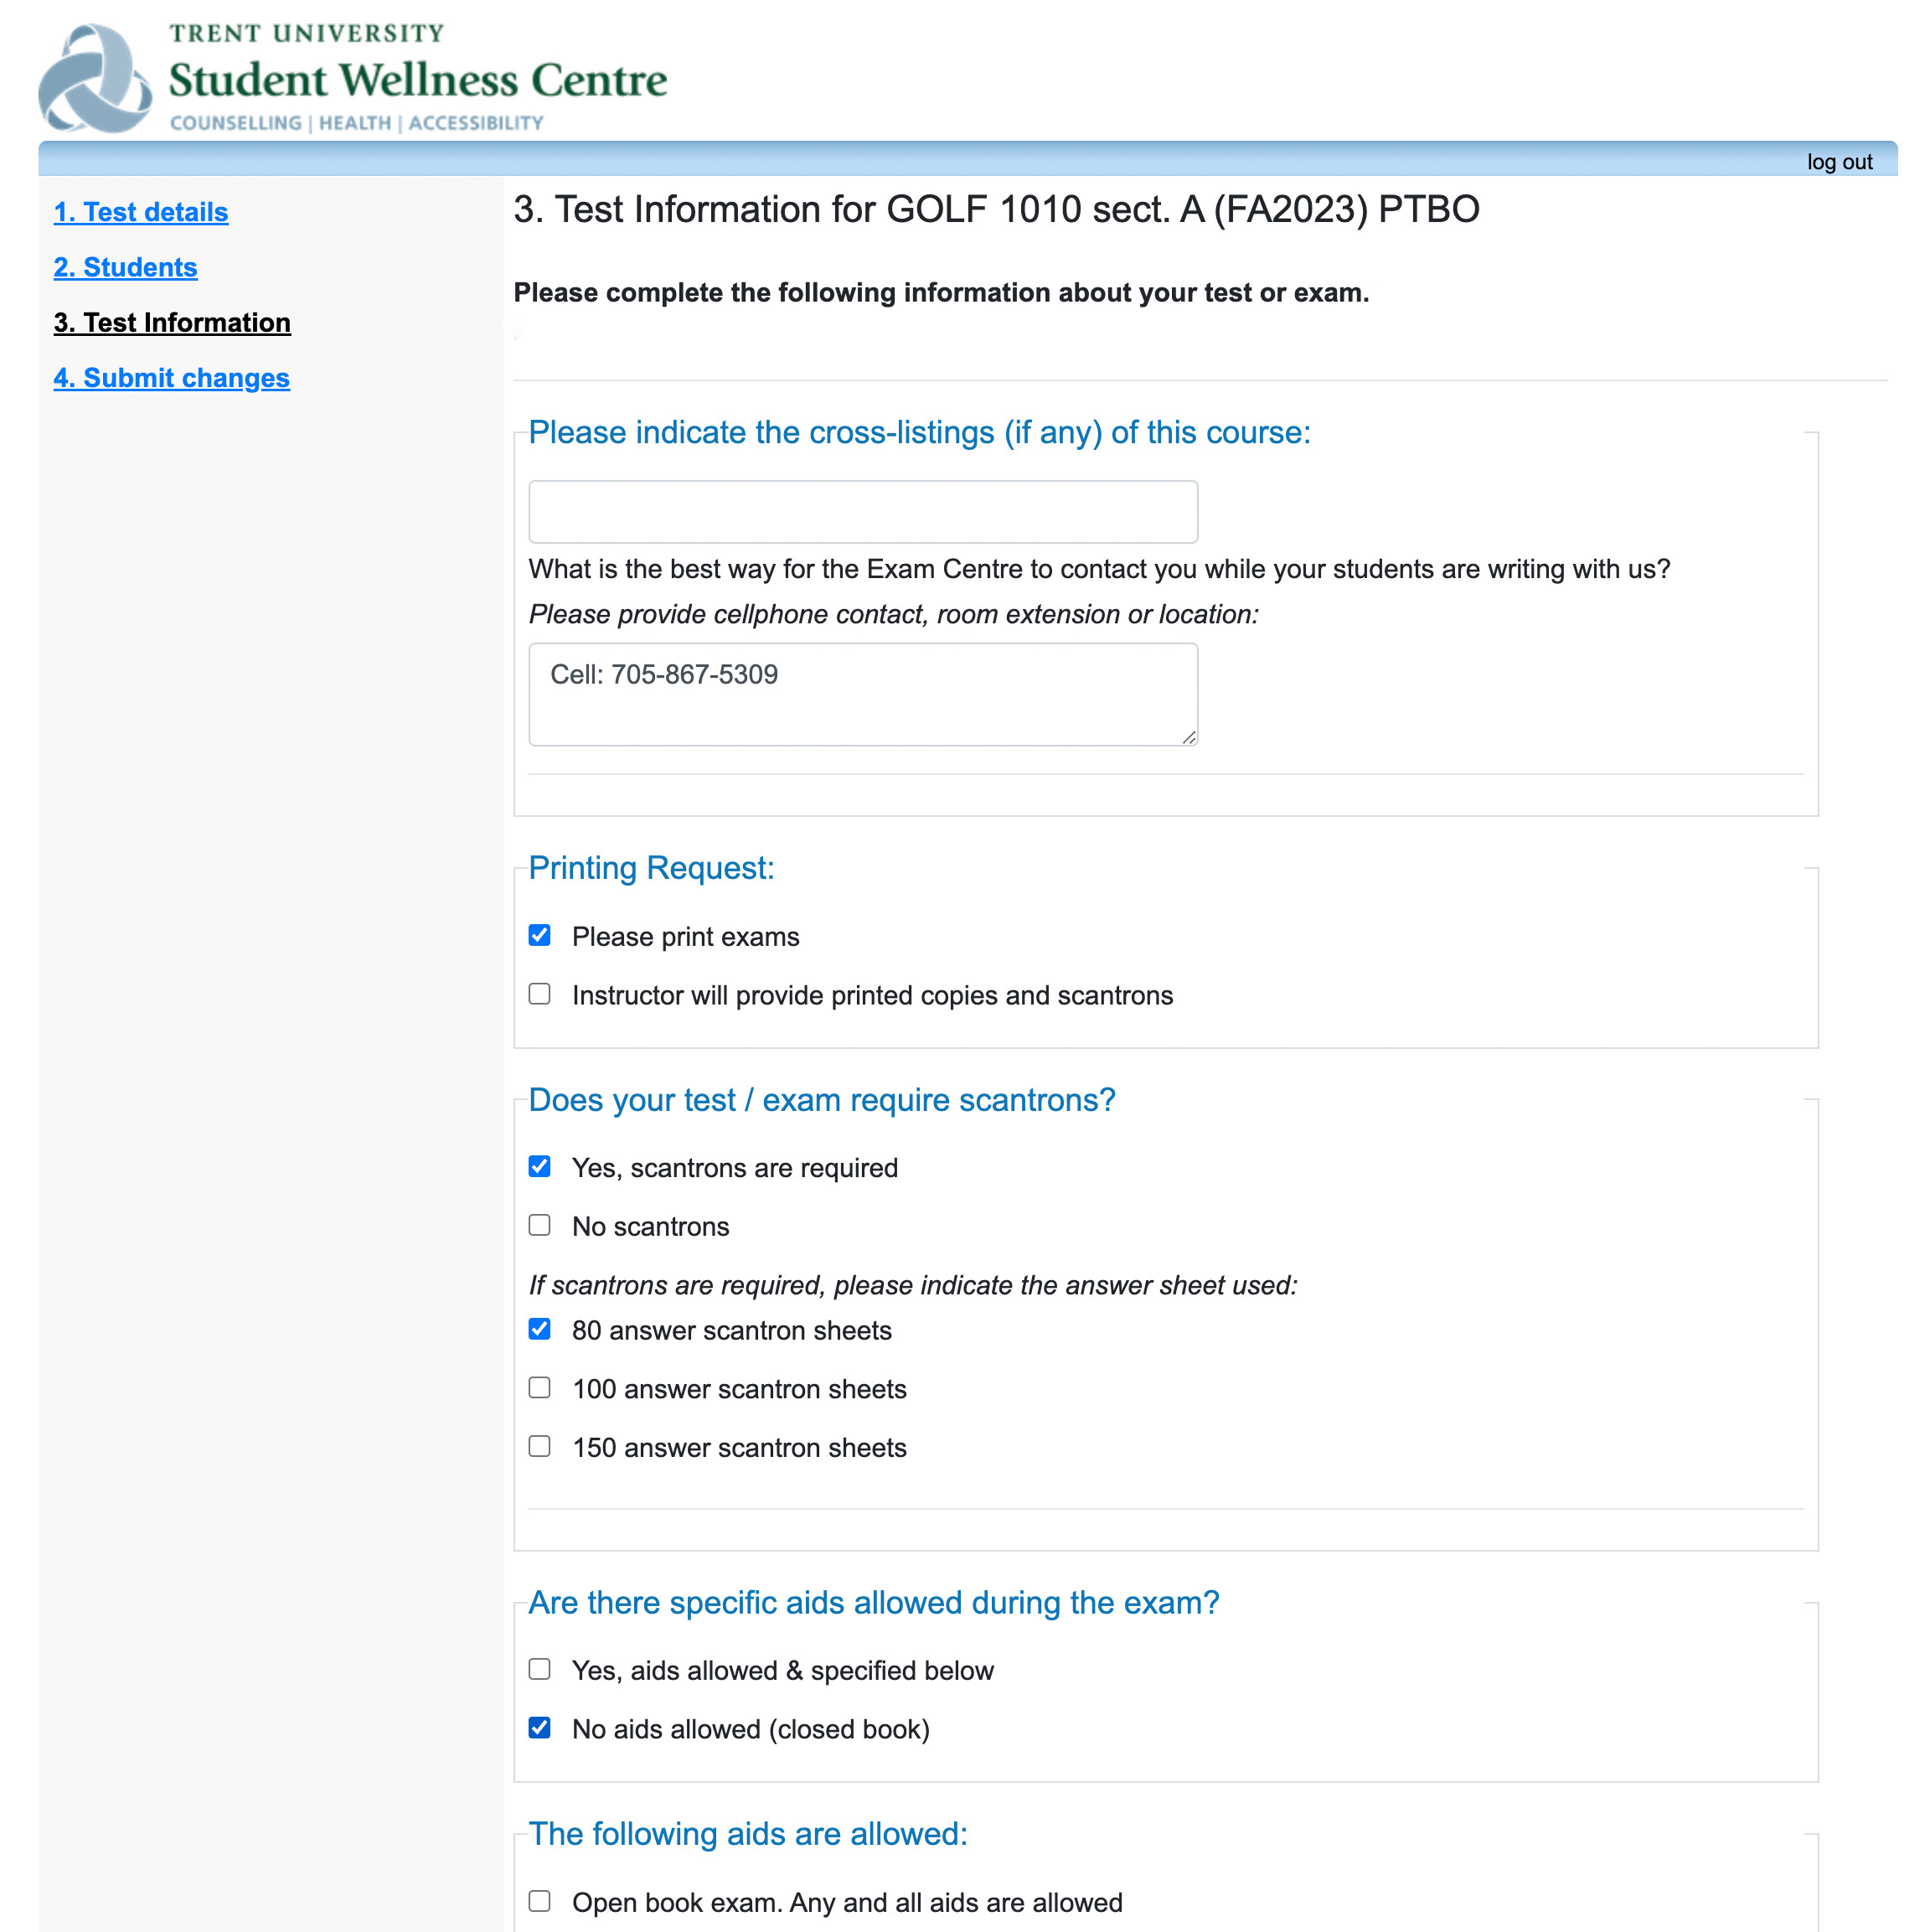
This step is the modern 'Exam Drop-off Checklist'. Please be a detailed as possible with allowed resources, aids or other invigilation instructions for your test/exam.
Step 6 - Upload your test / Exam
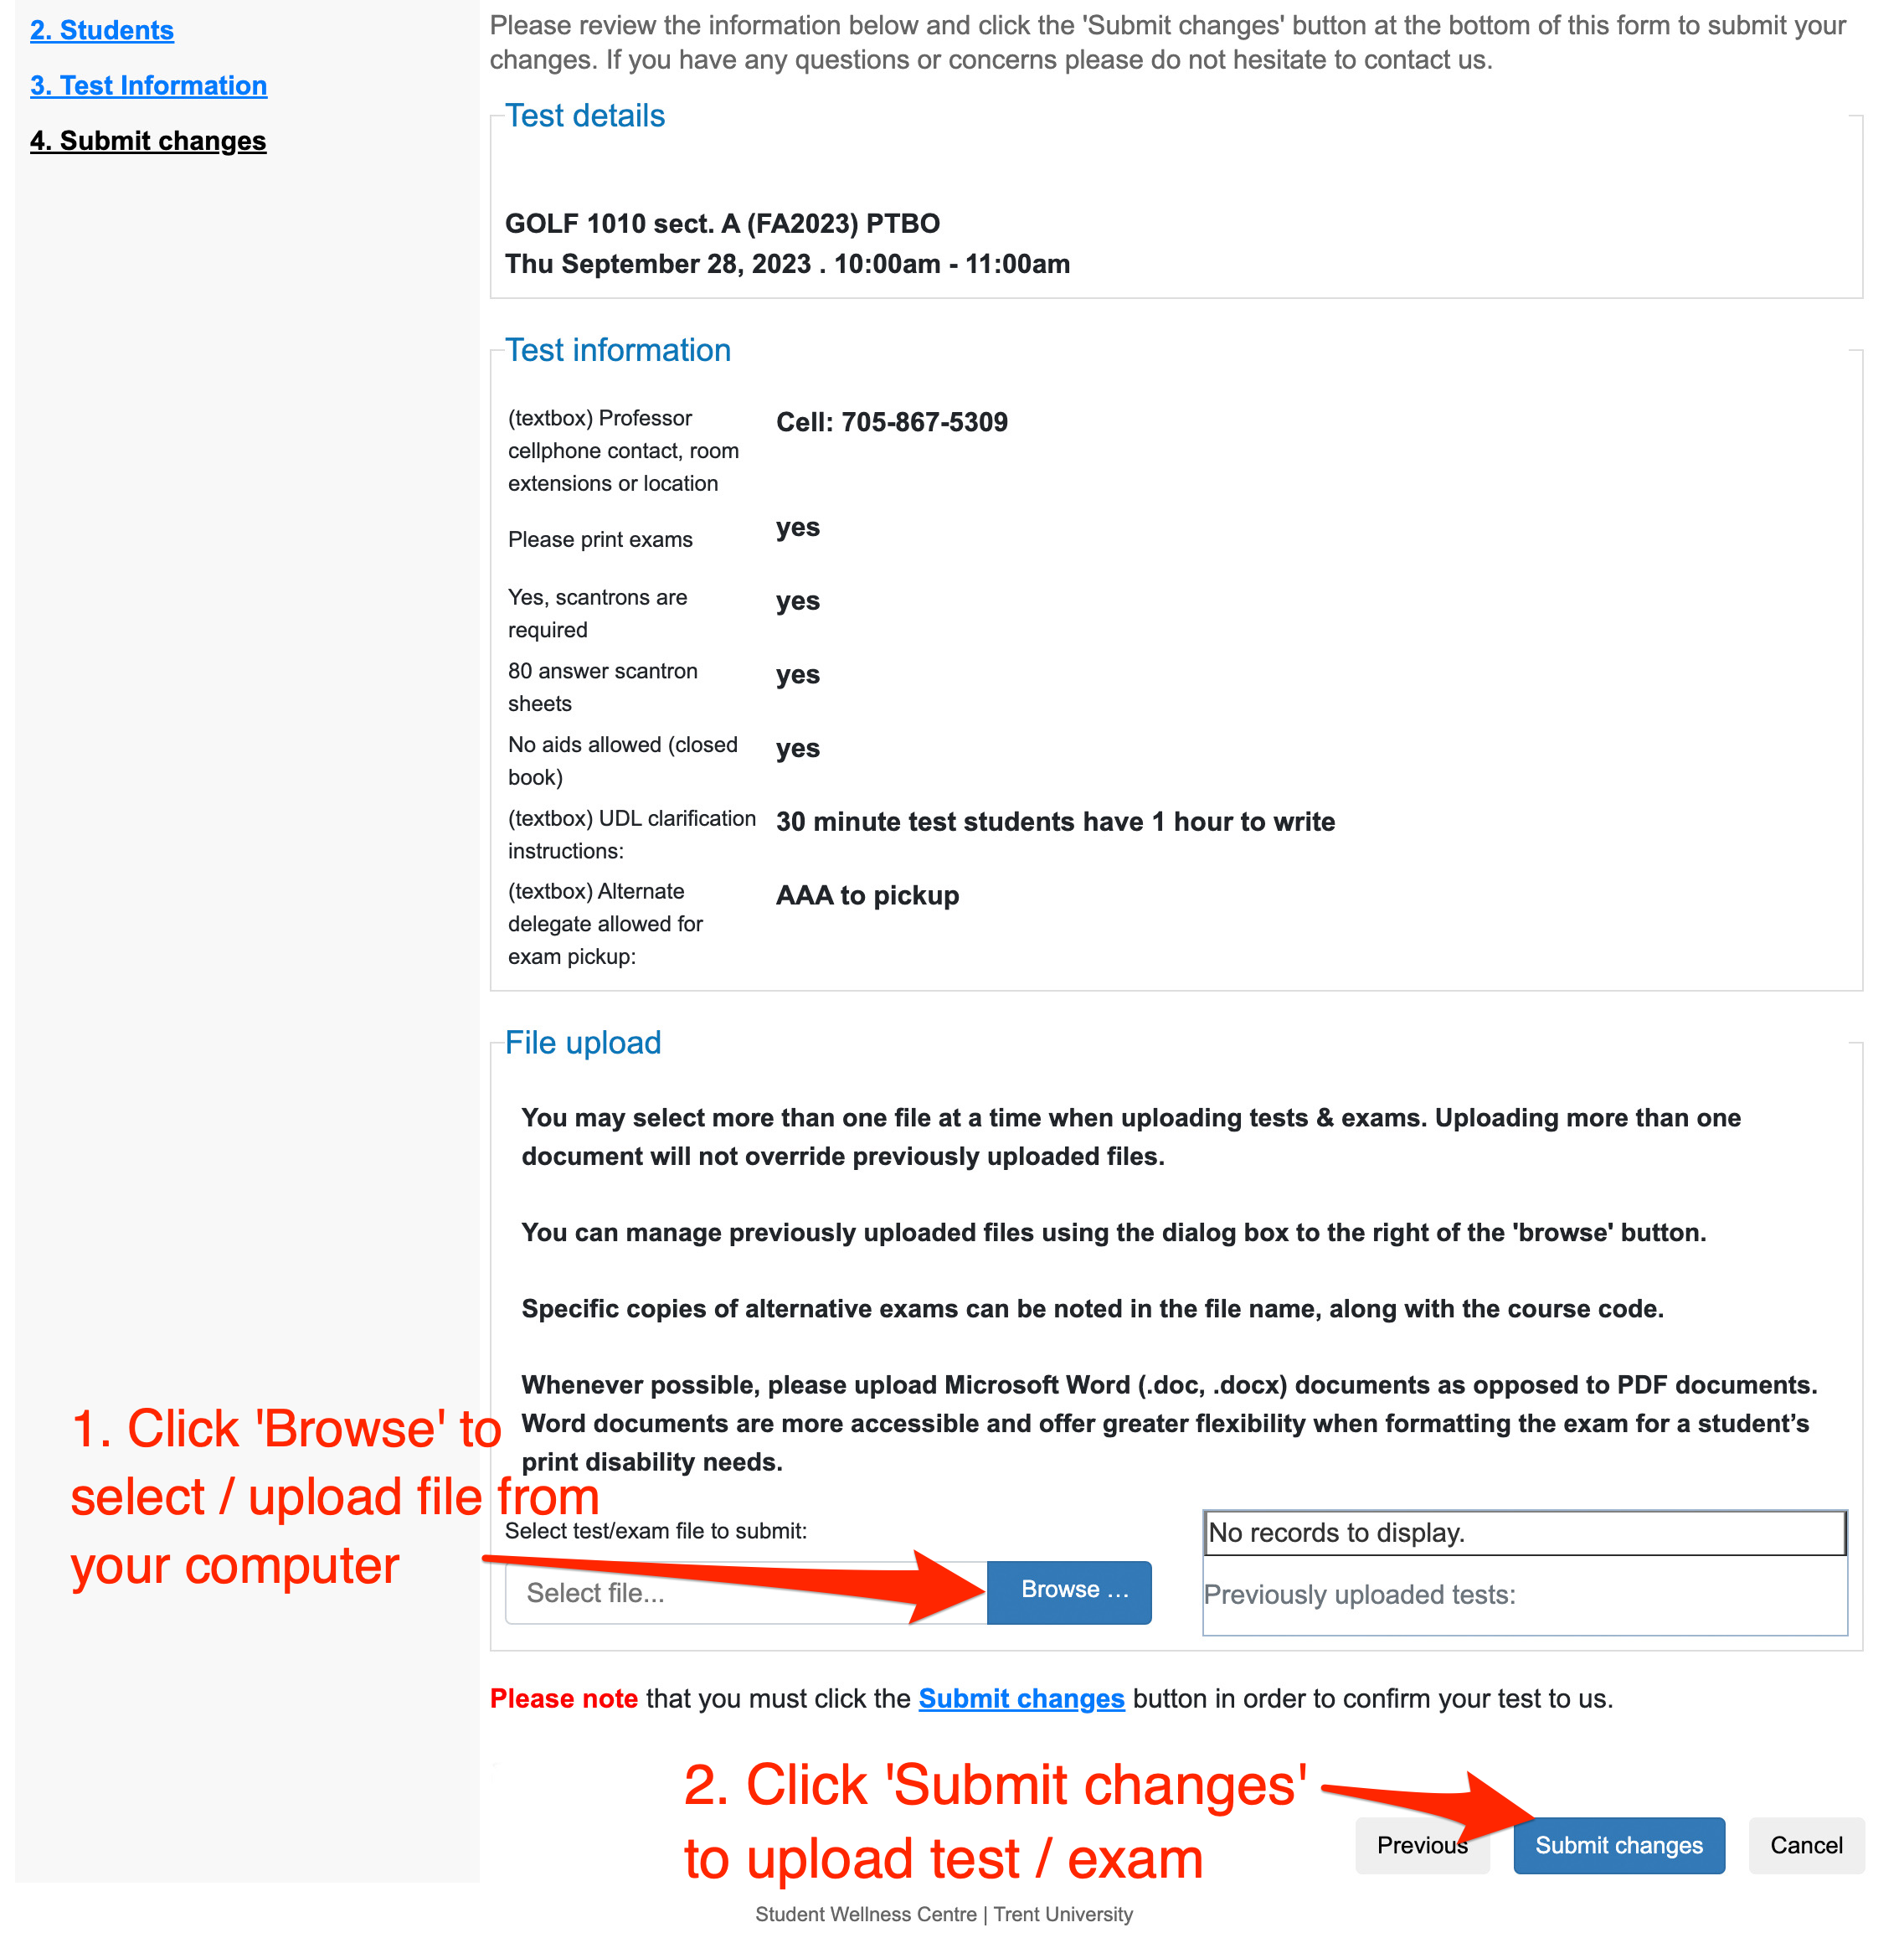
The most important part of the process! This is where you may upload accessible, electronic copies of your test or exam to the CAT for accessible format & printing purposes.
Some important things to note:
- You may select more than one file during the upload process; previously uploaded files are not overwritten.
- Whenever possible, please upload Microsoft Word documents (.doc, .docx) as opposed to PDF files for accessibility related reasons.
Step 7 (optional) - Management of previously uploaded files
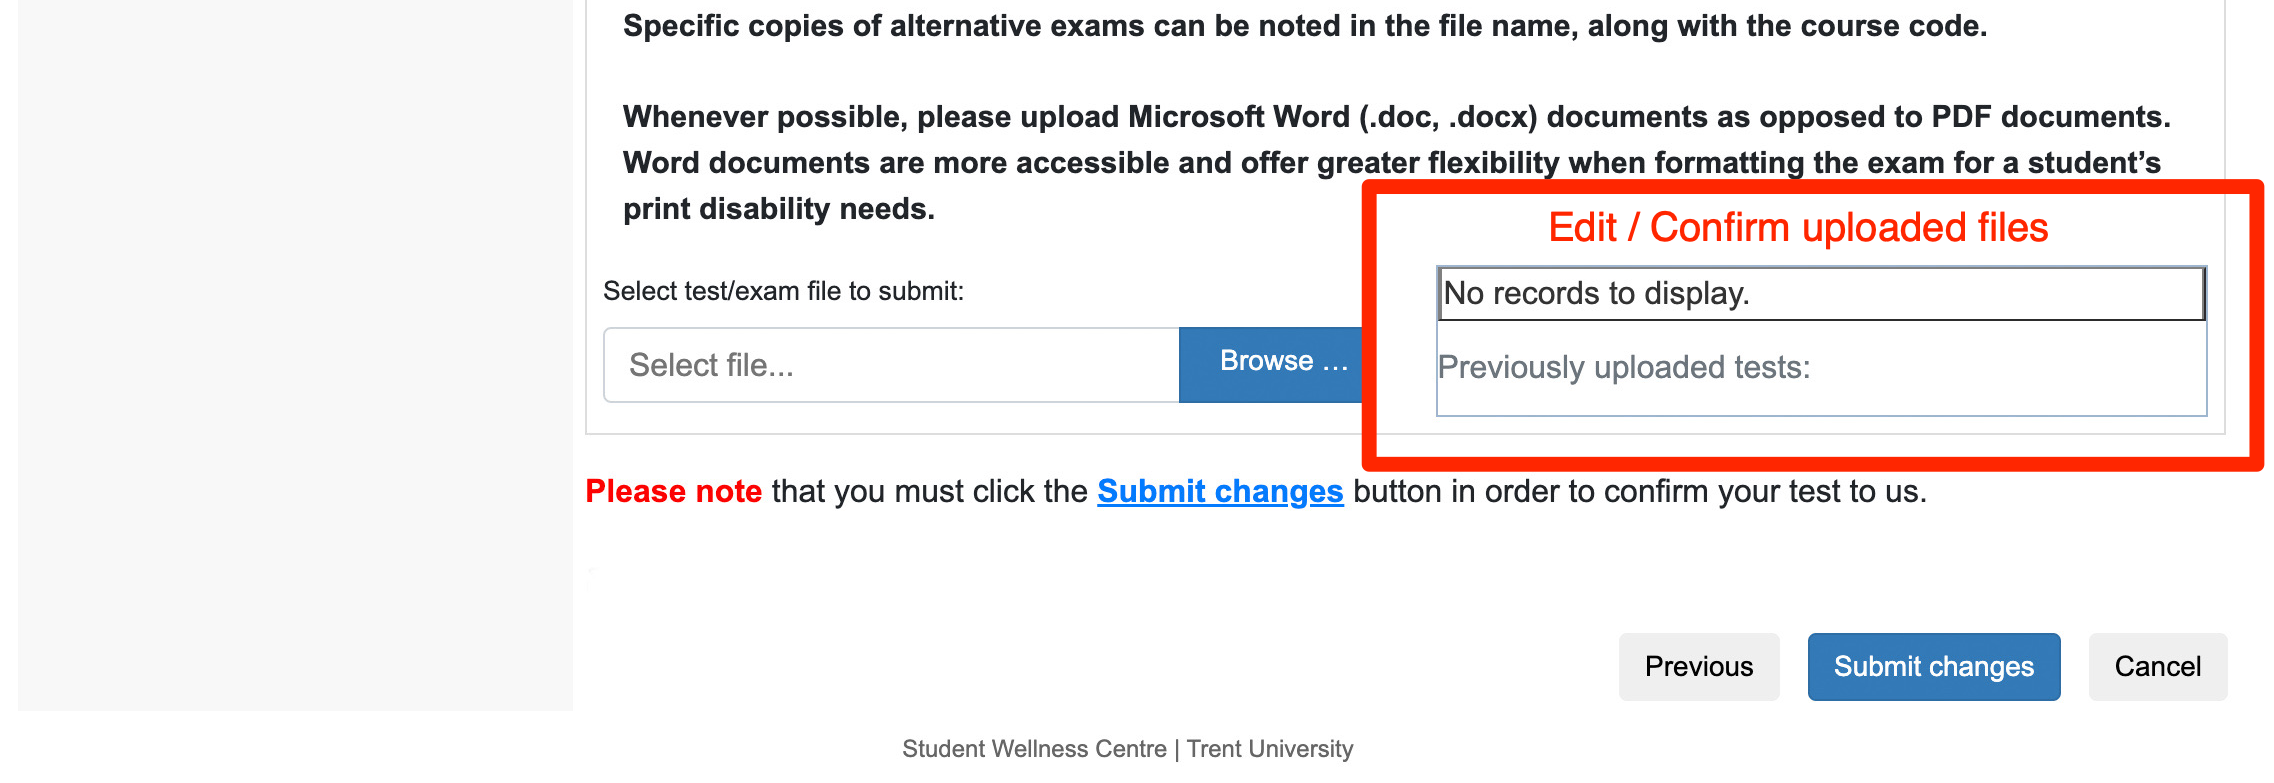
If you accidentally upload the wrong file, you need to add additional files or need to upload a modified copy of a previously uploaded test or exam, you may do so using this section.
Step 8 - Exam upload complete!
That's it - you're done! Thank you for your support!


